We know the feeling all too well: a celebration is coming up, and the pressure sets in to bring a dessert that will leave a positive impression. However, you aren’t exactly sure how to do that. Your cake is ready, and the frosting is whipped to perfection. Now what? Before you dive into that bowl of frosting, let Dutch Apron® Bakery help you prepare and give you some tips on the basics of cake decorating. We’ve outlined everything you’ll need to have a successful day of cake decorating. Welcome to Cake Decorating 101!
-
Start out with the best canvas: a Dutch Apron Bakery cake roll!
When it comes to cake decorating, the first thing you’ll need to decide is what delicious items you’ll be using to create your masterpiece. There are four main components in cake decorating: cake, filling, frosting, and decorations. However, creating every component from scratch can be difficult and time consuming. Take it from us, baking can be difficult. Let Dutch Apron Bakery handle the trickiest part: providing a canvas for your individual creativity. Our desserts are made with moist, delicious cake and creamy fillings, so all you have to worry about is the frosting and decorations. With our cake rolls, the possibilities for innovation are endless.
-
Gather the necessary tools
A cake decorator is only as good as their tools. We recommend you start with the basics:
- Offset spatula
- Piping bags and tips
- Extra bowls
- Washcloths or paper towels
- Turntable (optional)
-
Apply the crumb coat
A crumb coat is a thin layer of frosting that is applied to the cake before the top layer. It protects the top layer of frosting from mixing with the crumbs of the cake, resulting in a smooth finish. Place a dollop of frosting on top of the cake and spread evenly in a thin layer with an offset spatula. If you’d like, you can use a turntable to spin the cake around as you push the icing towards the edges.
Refrigerate for 20 minutes or until the crumb coat has hardened. Before moving on to the next step, use a small bowl to scrape off your spatula and clean off any extra icing that may have crumbs sticking to it.
-
Apply top layer of icing
Just like with the crumb coat, place a larger dollop of frosting on top of the chilled cake. Spread the frosting around the cake roll with the offset spatula until the cake is completely covered with a thick, even layer of frosting. If you’re using a turntable, spin it around as you push excess icing towards the edges.
Tip: Decide whether or not you want to cover the swirl on your cake roll. Some people choose to frost the ends while others leave them exposed, so people can enjoy the look of that perfect swirl.
-
Smooth the sides
To get a smoother top layer of frosting on your cake, dip the offset spatula in hot water and wipe it off with a towel. Carefully run the spatula around the top and sides of the cake. The heat from the spatula will slightly melt the top layer of frosting, giving it a smoother finish.
-
Piping
Learning to pipe takes a lot of practice. There are many different sizes and shapes of tips that will give your cake a different look. For this guide, we’ll give you some basic instructions on how to pipe a border around your cake.
First, fit a pastry bag with a tip of your choosing and fill the bag with frosting. To pipe a border around the bottom of your cake, place the tip at a 45° angle where the bottom of the cake meets the plate or serving platter. Press gently on the bag in one short burst to pipe out the desired shape. Release pressure as you pull the bag away. Repeat this process all around the cake to create a bottom border.
-
Add garnishes
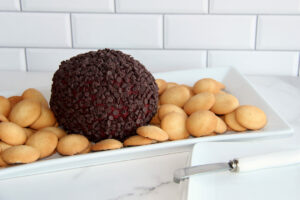
Garnishes make for a great finishing touch. First, pour your garnishes into a separate bowl. Then use your fingers or a spoon to apply them to your cake. This method will give you more control over the placement of your decorations. Make sure to apply the desired garnishes before storing the finished dessert in the refrigerator. Otherwise, the frosting will be too solid, and the decorations won’t stick.
Remember to be patient as you go through this process. It may take you a few tries to get it right. Frosting and piping, especially, will become easier with time and practice. Once you master the basics, you can further personalize your creations with your favorite designs and decorations. Creating head-turning desserts may be intimidating, but Dutch Apron Bakery is here to help you take care of the stress to impress with our delicious cake rolls that are always party-ready.