No Easter gathering is complete without a slice of carrot cake for dessert. It’s a holiday classic that families look forward to indulging in every year. However, this Easter, we thought the traditional carrot cake could use a bit of a makeover. That’s why we decided to turn our Carrot Cake Cake Roll into these vibrant, flavorful Easter Egg Petit Fours.
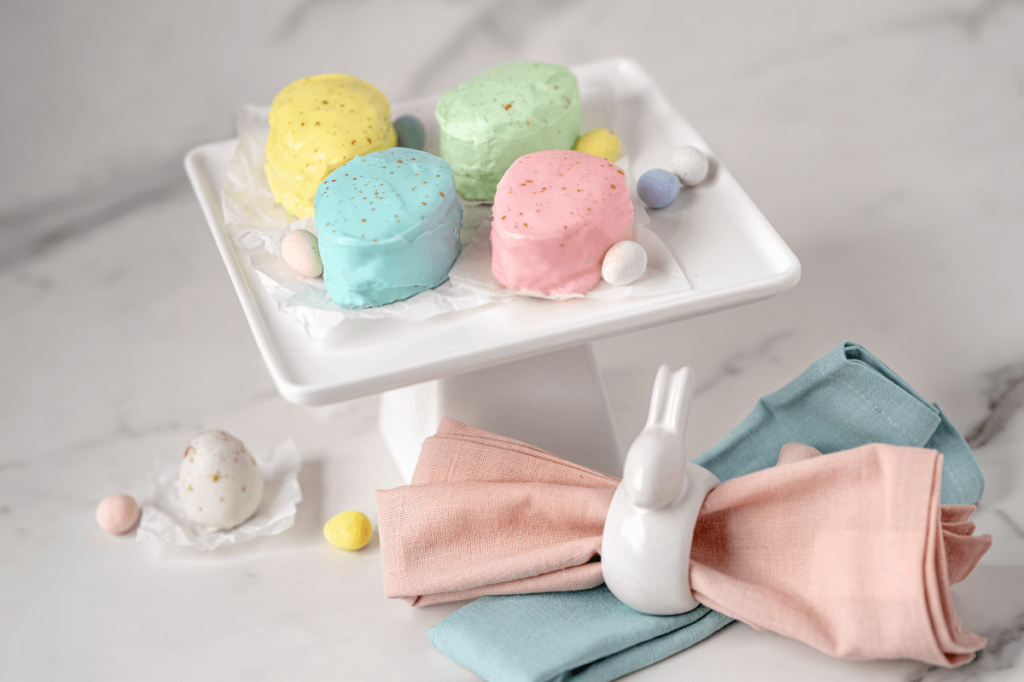
These mini cakes are beautiful; they’re covered in pastel-colored cream cheese frosting and speckled with edible gold paint to make them resemble Robin eggs. Easter Egg Petit Fours are light enough to serve at brunch but indulgent enough to be served as part of an elaborate holiday celebration. It’s an eye-catching finale that will fit right in at any Easter feast.
More Desserts for Easter
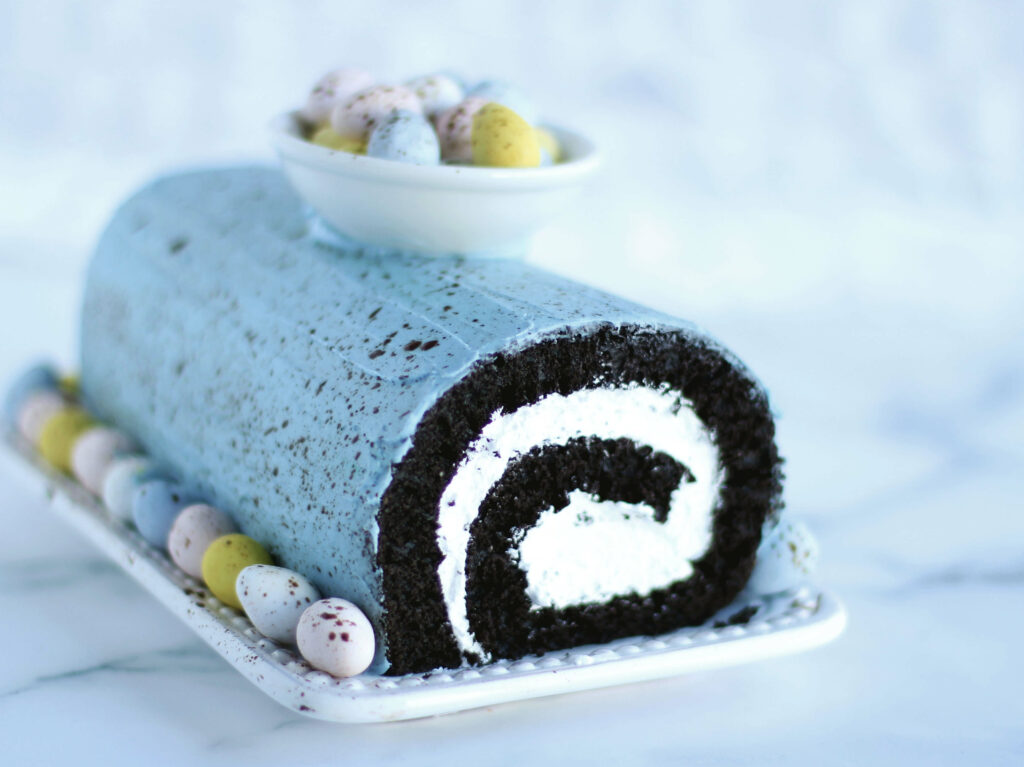
Speckled Egg Cake Roll
Effortlessly impress your guests with a beautiful Speckled Egg Cake Roll for Easter! This Chocolate Crème Cake Roll is covered in light blue frosting and speckled with cocoa to resemble a Robin’s egg. It’s a creative cake that could not be easier to decorate and makes a stunning centerpiece for your Easter celebration.
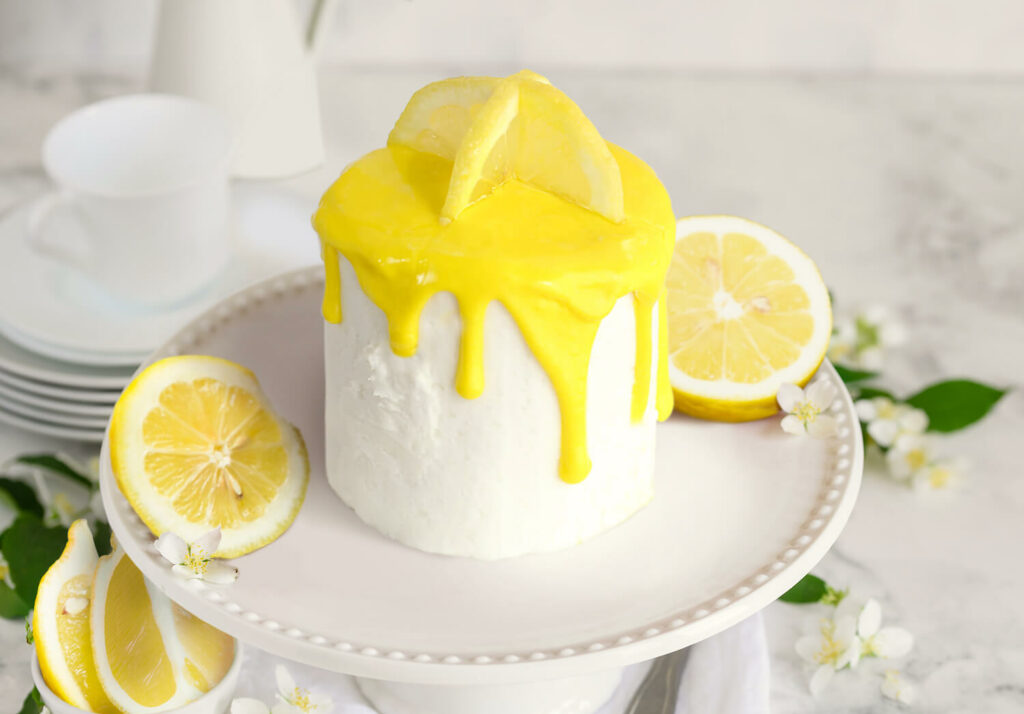
Lemon Drip Cake Roll
Our Lemon Drip Cake Roll literally melts in your mouth. Moist and packed full of lemon flavor, from the cake to the crème filling, it’s a citrus lover’s dream. The beautiful yellow drip and decorative lemon slices give it the perfect finishing touch.
What are Petit Fours?
Traditionally, petit fours are any small dish that can be eaten in only a few bites. They can be savory or sweet, but they’re always beautifully decorated. Most often, petit fours refer to a dessert made with layers of sponge cake that is decorated with fondant, marzipan, or frosting.
What You’ll Need
- A small offset spatula or butter knife to even out the frosting on the top and sides of your petit fours.
- To make transferring and decorating the petit fours easy and mess-free, you’ll need parchment paper, a cookie sheet, and a cooling rack.
- To shape your cake slices, you’ll need an egg-shaped cookie cutter. The one we used was about 2 ½ in. long by 1 ¾ in. wide.
- A clean, food-grade paint brush will be what you use to create the gold specks on the tops and sides of your finished petit fours.
- Serve on a decorative platter. If you’re serving them at your Easter brunch, we suggest something white to emphasize the beautiful, pastel colors of your petit fours.
Storage Information
Once the frosting on your Easter Egg Petit Fours has completely dried, you can store them in an airtight container in the refrigerator for about a week. When removing them, let them sit on a counter until they reach room temperature before serving.
Tips for Making Easter Egg Petit Fours
- Chilling your petit fours before adding frosting is very important. A chilled cake is easier to decorate and less delicate. A room temperature cake is more fragile which means it is more likely to break or fall apart when you begin to add on the frosting.
- Each of your petit fours will have two coatings of frosting: a crumb coat and a final coat. The crumb coat is important as it helps to “glue” the crumbs of your cake down and provides an even base for additional frosting. Do not use all your frosting during your first pour.
- For the leftover scraps of the cake roll, you can mash them up with leftover frosting to make a cake pop batter. Then, roll them into egg shapes, cover them in white chocolate, and splatter them with edible gold paint. It’s a great extra treat for you and your family to enjoy while waiting to indulge in the petit fours on Easter day.
How to Craft Your Own Easter Egg Petit Fours
Ingredients
- 1 Dutch Apron® Bakery Carrot Cake Cake Roll
- 1 can of cream cheese frosting
- 4 different colors of gel food coloring
- Note: we used blue, green, yellow, and pink.
- Edible gold paint
Instructions
- Let your cake roll thaw on your counter for 10-15 minutes.
- Place a piece of parchment paper on a cookie sheet. Once thawed, place your cake roll on top of the parchment paper.
- Carefully, unroll the cake roll, scraping any filling off the rolled side and transferring it to the side you are unrolling. There should be no filling on the side that will be against the parchment paper.
- Once the cake roll is flattened, spread all the filling evenly over the top of the flattened cake roll.
- Cut the slab of cake in half. Place one half on top of the other filling-side down. Press down lightly and smooth out any filling that may come out the sides.
- Take your egg-shaped cookie cutter and use it to cut out sections of your cake. You should be able to get roughly 8-10 pieces, depending on how close you cut them.
- Put each of your egg-shaped cake pieces on the cooling rack. Place the cooling rack on the parchment-lined cookie pan. Then, put it in the fridge to chill while you prepare your frosting.
- Split your cream cheese frosting into four different bowls. Color each one with your preferred shades of gel food coloring.
- Tip: You want your colors to be a nice, pale pastel, so you won’t need very much of the food coloring.
- Remove the egg-shaped cake pieces from the fridge and place on the counter.
- Working with one color at a time, put the bowl of frosting in the microwave for 5-8 seconds. You want the frosting to have a looser consistency, so it can be easily poured. Do not overheat it or it will become too runny.
- Pour half of the frosting on top of your egg-shaped cake pieces. You’ll want to do 2-3 cake pieces per color. Then, take your offset spatula and gently smooth out the frosting on the top and sides until the whole cake piece is covered. This is your crumb coat.
- After you’ve done the crumb coat on all your cake pieces, put them back in the refrigerator for 5-10 minutes.
- Once the crumb coat has set, repeat step 12 with all the colors again. This will create a nice, even coating of the colored frosting on each of your petit fours.
- Next, take your edible gold paint and dip your paint brush in it. Use your finger to flick the bristles of the paint brush over each of your petit fours. This will create specks of gold to give your petit fours a more egg-like appearance.
- Tip: Practice this technique on a piece of paper or paper towel to get an idea of how much gold paint to add to your brush as well as the distance to hold your brush from the petit fours.
- Transfer the petit fours to a decorative platter or store them until you are ready to serve.
If you’re looking for a stand-out Easter dessert, give these Easter Egg Petit Fours a try. The layering of the Carrot Cake Cake Roll is what makes these petit fours even more moist, flavorful, and interesting to eat. A smooth finish, assortment of pastel frosting, and gold specks combine with the delicious cake to create a series of gorgeous desserts. Your guests will be “hopping” with happiness when they see these on your dessert table this Easter.